Install Home Assistant Hass.io as Virtual Machine (VM) on VMware ESXi
I started exploring Home Assistant Hass.io on a Raspberry Pi. After several SD card crashes I decided to installed Hass.io as Virtual Machine (VM) on VMware ESXi. There is a VMDK version available (link ) that can attached (this involves manual steps) but I prefer a clean installation. VMware ESXi is installed on my Shuttle SH370R6 plus home lab server (link ).
Update: June 2021: Ubuntu is not supported anymore as Operating System for Home Assistant. See my blog post about installing the Debian for Home Assistant for more information.
Other advantages of running Hass.io as VM on VMware ESXi are for example:
- The Raspberry PI has limited hardware resources and can be a performance bottleneck when using more and more sensors and installing Hass.io add-ons. A home lab server offers more CPU power, memory and storage performance.
- Snapshot functionality. Quickly make a Virtual Machine snapshot before upgrading the add-ons or Hass.io itself. When something went wrong during the upgrade, simply revert the snapshot and everything works again within seconds.
- The installation of Hass.io in a Ubuntu VM on ESXi is simple.
- USB sticks like Z-Wave or Zigbee2MQTT can be attached to the Hass.io VM using ESXi USB pass-through.
Here are the steps outlined how-to install an Ubuntu VM and install Hass.io.
Configure the Virtual Machine hardware specifications
- Download Ubuntu 18.04.2 LTS (Long-Term Support), link.
- Make a connection to the ESXi host: https://
/ui - Upload the Ubuntu ISO to a datastore
- Create a new virtual machine with the following specifications:
- Name: HA-01
- Compatibility: ESXi 6.7 virtual machine
- Guest OS family: Linux
- Guest OS version: Ubuntu Linux (64-bit)
- Storage: datastore with 30 GB free space
- CPUs: 2
- Memory: 2048 MB
- Hard disk 1: 30 GB
- Disk Provisioning: Thin provisioned
- SCSI Controller 0: VMware Paravirtual
- USB controller 1: USB 2.0 or 3.0 depending on the ESXi hardware
- Network adapter 1: Select the portgroup
- Adapter type: VMXNET 3
- CD/DVD Drive 1: Datastore ISO file
- Browse to the Ubuntu ISO
- Connect: checked
- Video Card: Default settings
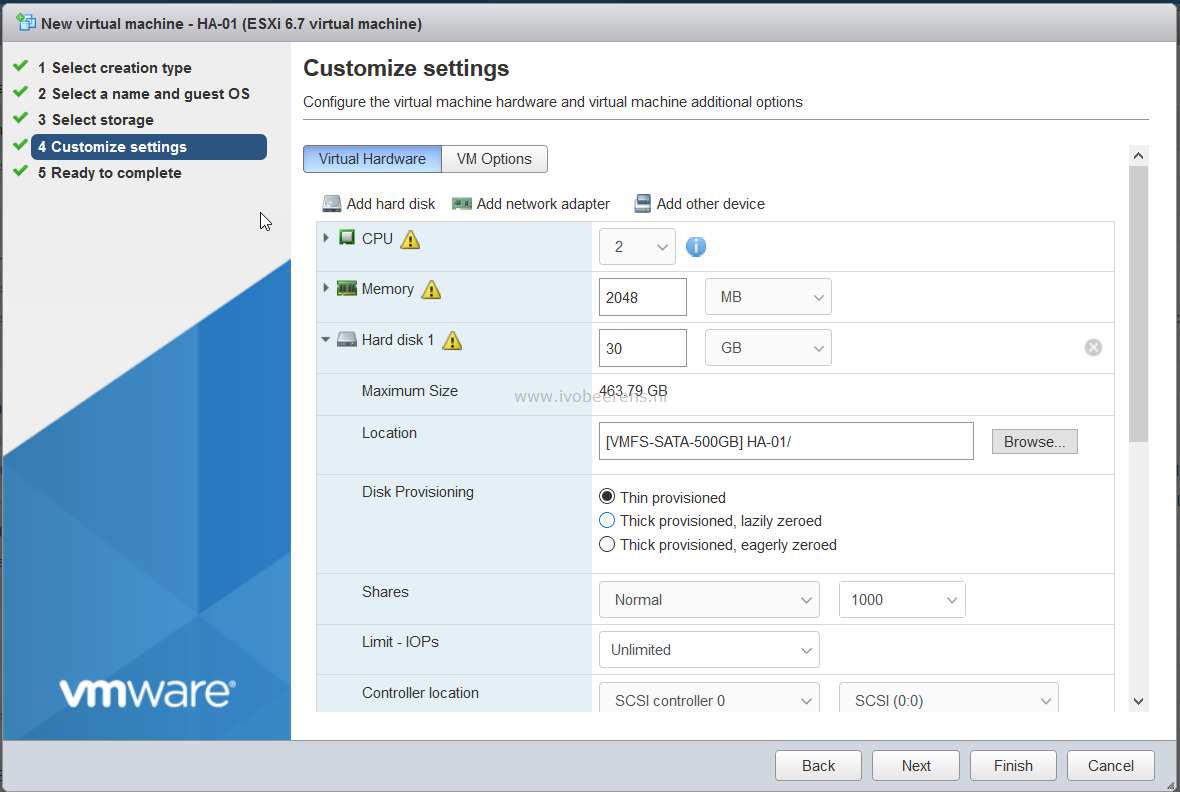

- Next
- Finish
- Power on the VM
- Open a console session
The VM has a paravirtualized SCSI controller (PVSCSI) and Virtual NIC (VMXNET3)
Install Ubuntu on ESXi
- Language: English
- Select: Install Ubuntu Server
- Choose your preferred language: English
- Keyboard configuration: Select the layout and variant: English US (
- Installation: Install Ubuntu
- Networking connections: The VMXNET3 NIC of the VM is displayed. Select for the IPv4 method DHCP or a manual fixed IP address
- Configure proxy: leave this blank
- Ubuntu mirror: Use the mirror address suggested
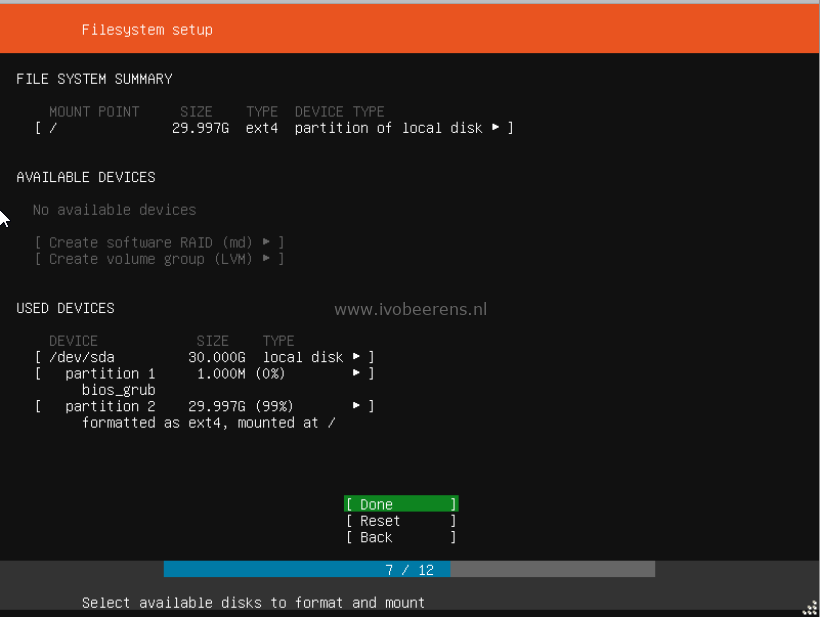
- Filesystem setup: Use an Entire Disk
- Choose the disk to install to: /dev/sda 30.00G
- Filesystem summary: Done
- Confirm destructive action. Are you sure you want to continue: Continue
- Profile setup: Fill in the following fields (remember the username and password)
- Your name:
- Your server’s name:
- Pick a username:
- Choose a password:
- Confirm a password:
- SSH Setup: Install OpenSSH server
- Import SSH identity: No
- Featured Server Snaps: Select none
- The installation of Ubuntu begins
- The installation is complete! Reboot the system
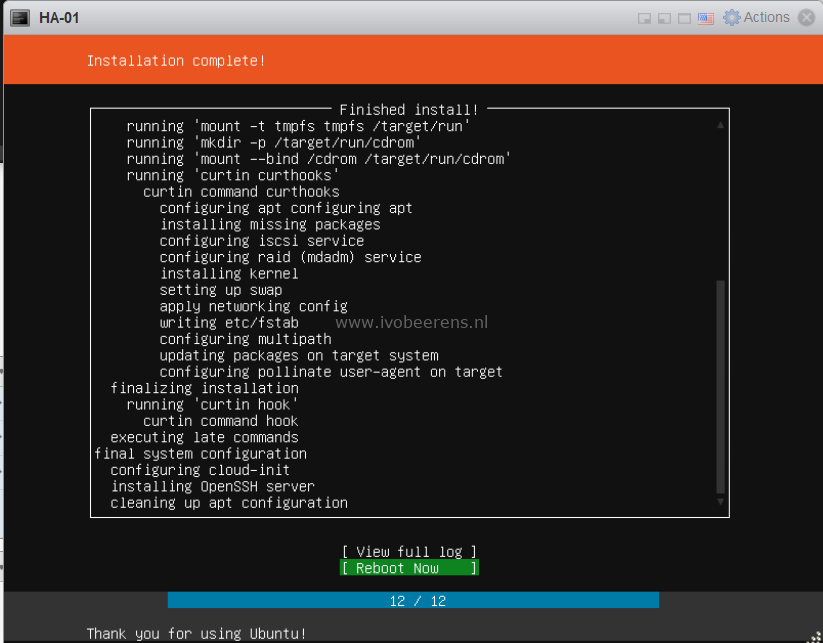
- Remove the attached Ubuntu ISO from the VM and press enter
- After the reboot it’s time to install Hass.io in the VM
The Open VM Tools is already installed by default so there no need to install this package.
Install Hass.io
- Because we installed OpenSSH we are using a SSH session for the Hass.io configuration.
- Connect to the IP address of thje Ubuntu VM using SSH (i’m using putty) for the connection.
- Packages requirements (link
) for Hass.io:
- apparmor-utils
- apt-transport-https
- avahi-daemon
- ca-certificates
- curl
- dbus
- jq
- network-manager
- socat
- software-properties-common (already installed in Ubuntu 18.04)
- As docker package Docker-CE must be installed.
- Use the following commands to install all the required packages and install Hass.io
sudo -i
add-apt-repository universe
apt-get update
apt-get install -y apparmor-utils apt-transport-https avahi-daemon ca-certificates curl dbus jq network-manager socat
curl -fsSL get.docker.com | sh
curl -sL https://raw.githubusercontent.com/home-assistant/hassio-installer/master/hassio_install.sh | bash -s
- After the installation check if there are two containers running using the following command:
root@ha-01:~# docker ps
CONTAINER ID IMAGE COMMAND CREATED STATUS PORTS NAMES
8def326c0ce7 homeassistant/qemux86-64-homeassistant "/bin/entry.sh pytho…" About a minute ago Up About a minute homeassistant
47945d4fe0f4 homeassistant/amd64-hassio-supervisor "python3 -m hassio" 2 minutes ago Up 2 minutes hassio_supervisor
root@ha-01:~#
- Connect to Hass.io: http://
:8123
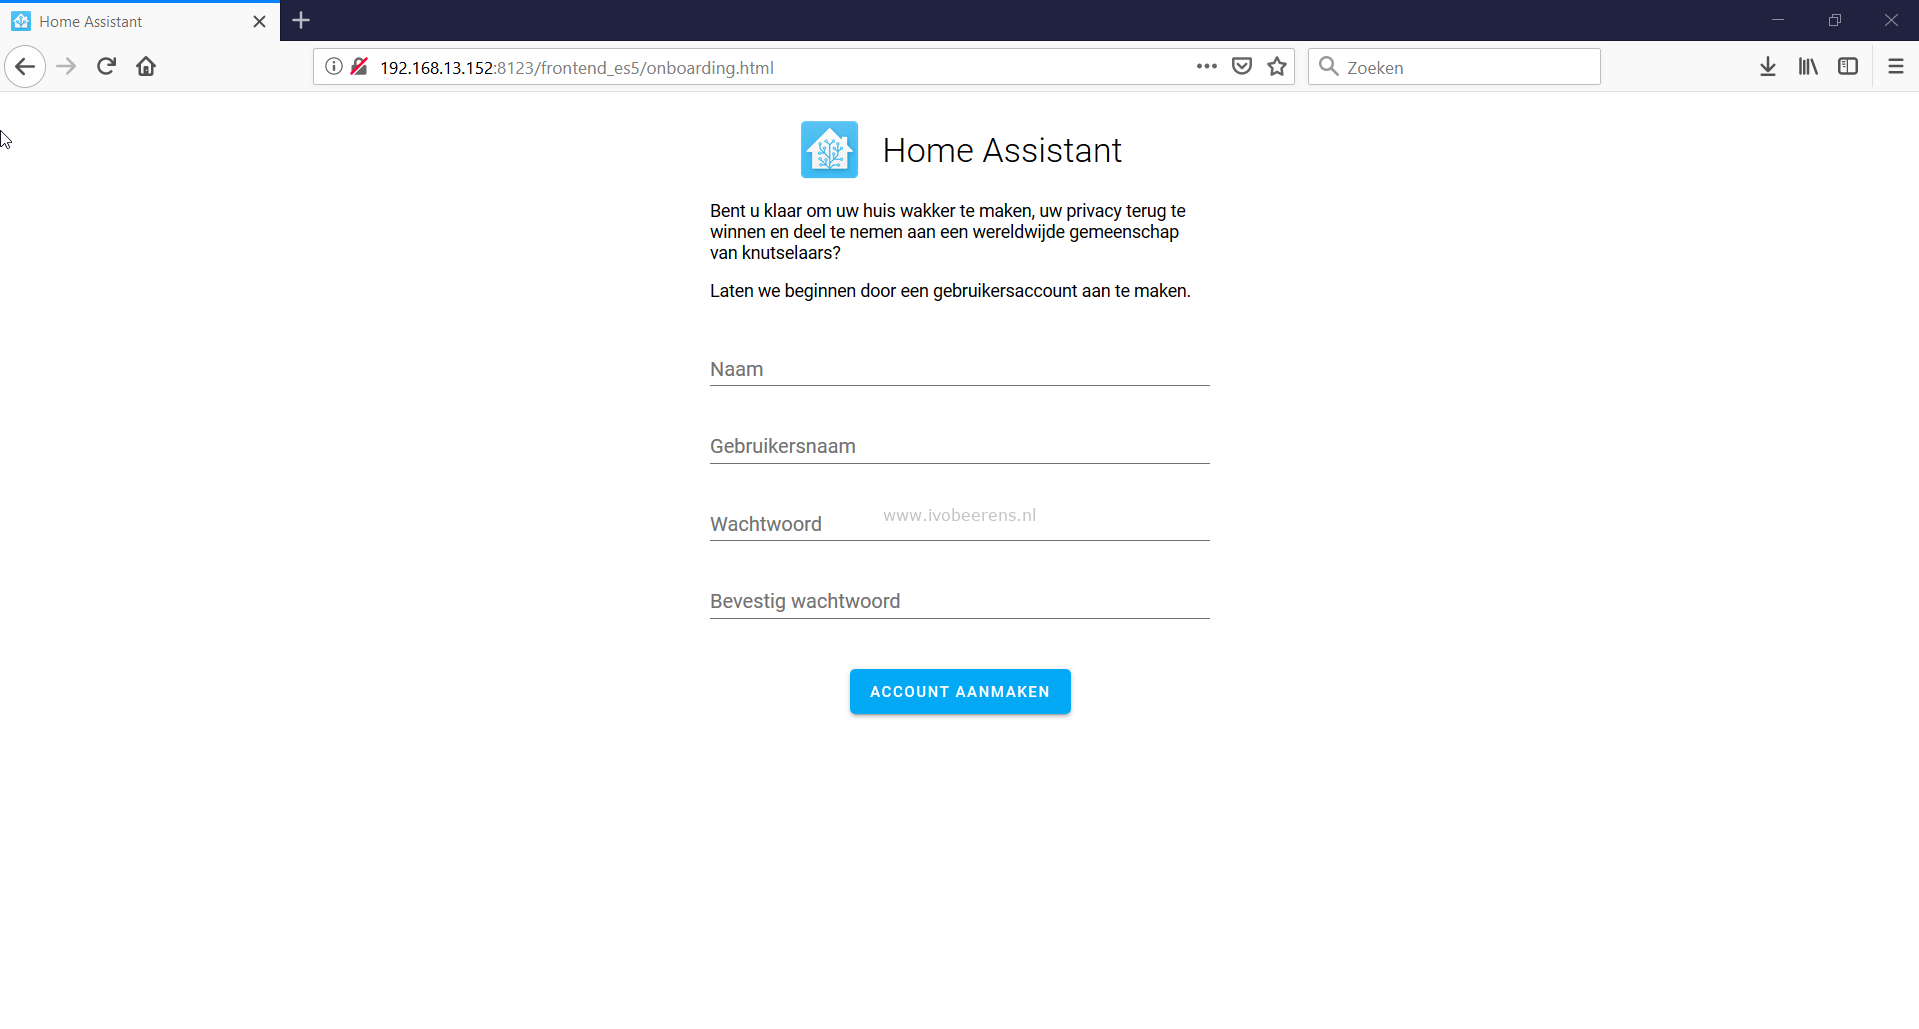
Home Assistant Hass.io is now running as VM on VMware ESXi.