Install Home Assistant on ESXi-ARM
One of the use cases for running ESXi-ARM in my home lab environment is running Home Assistant. Home Assistant is a great open-source platform for home automation. After assembling the Pi cluster (see my previous blog post ) and installing ESXi on ARM (ESXi-ARM) using the “Fling on Raspberry Pi ” documentation, it’s time to install Home Assistant.
In this example, I install the following components:
- Ubuntu for ARM
- VMware Tools
- Docker
- Home Assistant in a Docker container.
Pre-requisites
- Download
Ubuntu 20.04.1-live-server-arm64.isoor higher - Make a connection to the vCenter Server :
https://<vcenter server>/uior the local ESXi server https:// - Upload the Ubuntu ISO to a datastore
Home Assistant VM Creation
Create a new virtual machine with the following specifications:
- Right click Host Select Create/Register VM
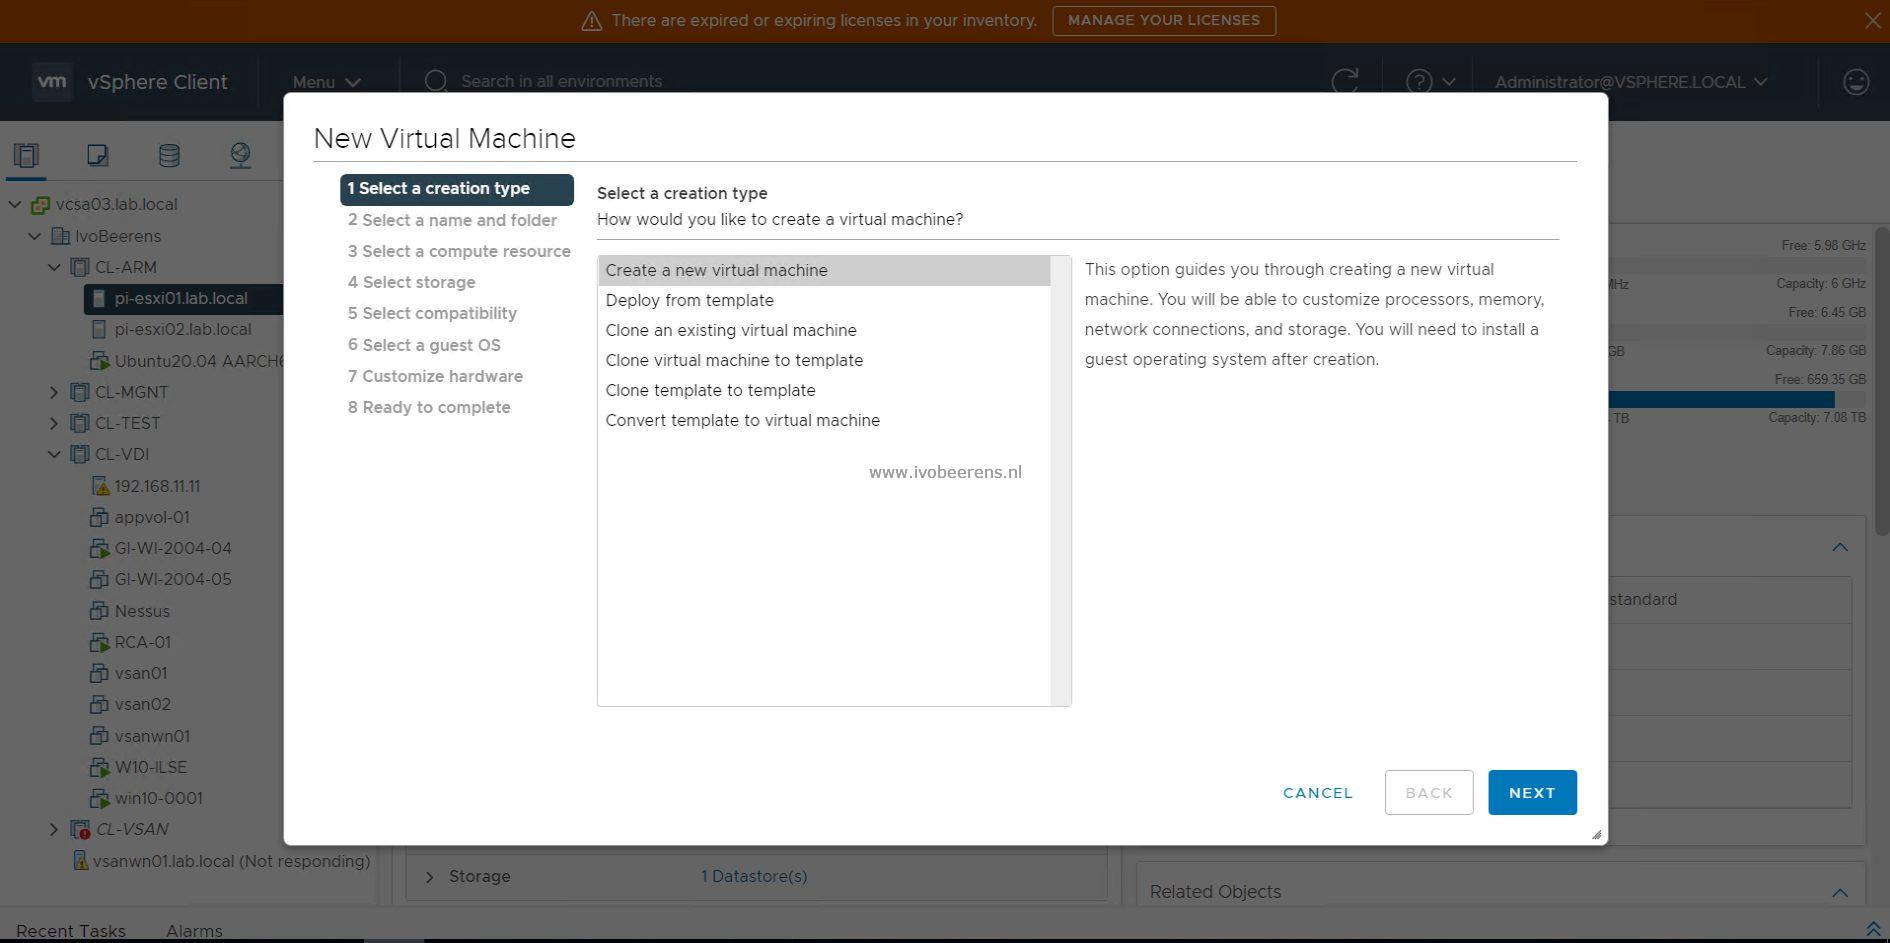
- Virtual Machine name: HomeAssstant-001
- Select a compute resource: select an ESXi server
- Select storage: Select the datastore
- Select compatibility: ESXi 7.0 and later
- Select a guest OS:
- Guest OS Family: Linux
- Guest OS Version: Ubuntu Linux (64-bit)
- Customize hardware:
- CPUs: 2
- Memory: 2048 MB
- Hard disk 1: 30 GB
- Network adapter 1: Select the port group
- Adapter type: E1000E
- CD/DVD Drive 1: Datastore ISO file
- Browse to the Ubuntu ISO
- Connect at Power On: checked
- Video Card: Default settings
- Next
- Finish
- Power on the VM
- Open a console session
Ubuntu Installation
- Select: Install Ubuntu Server
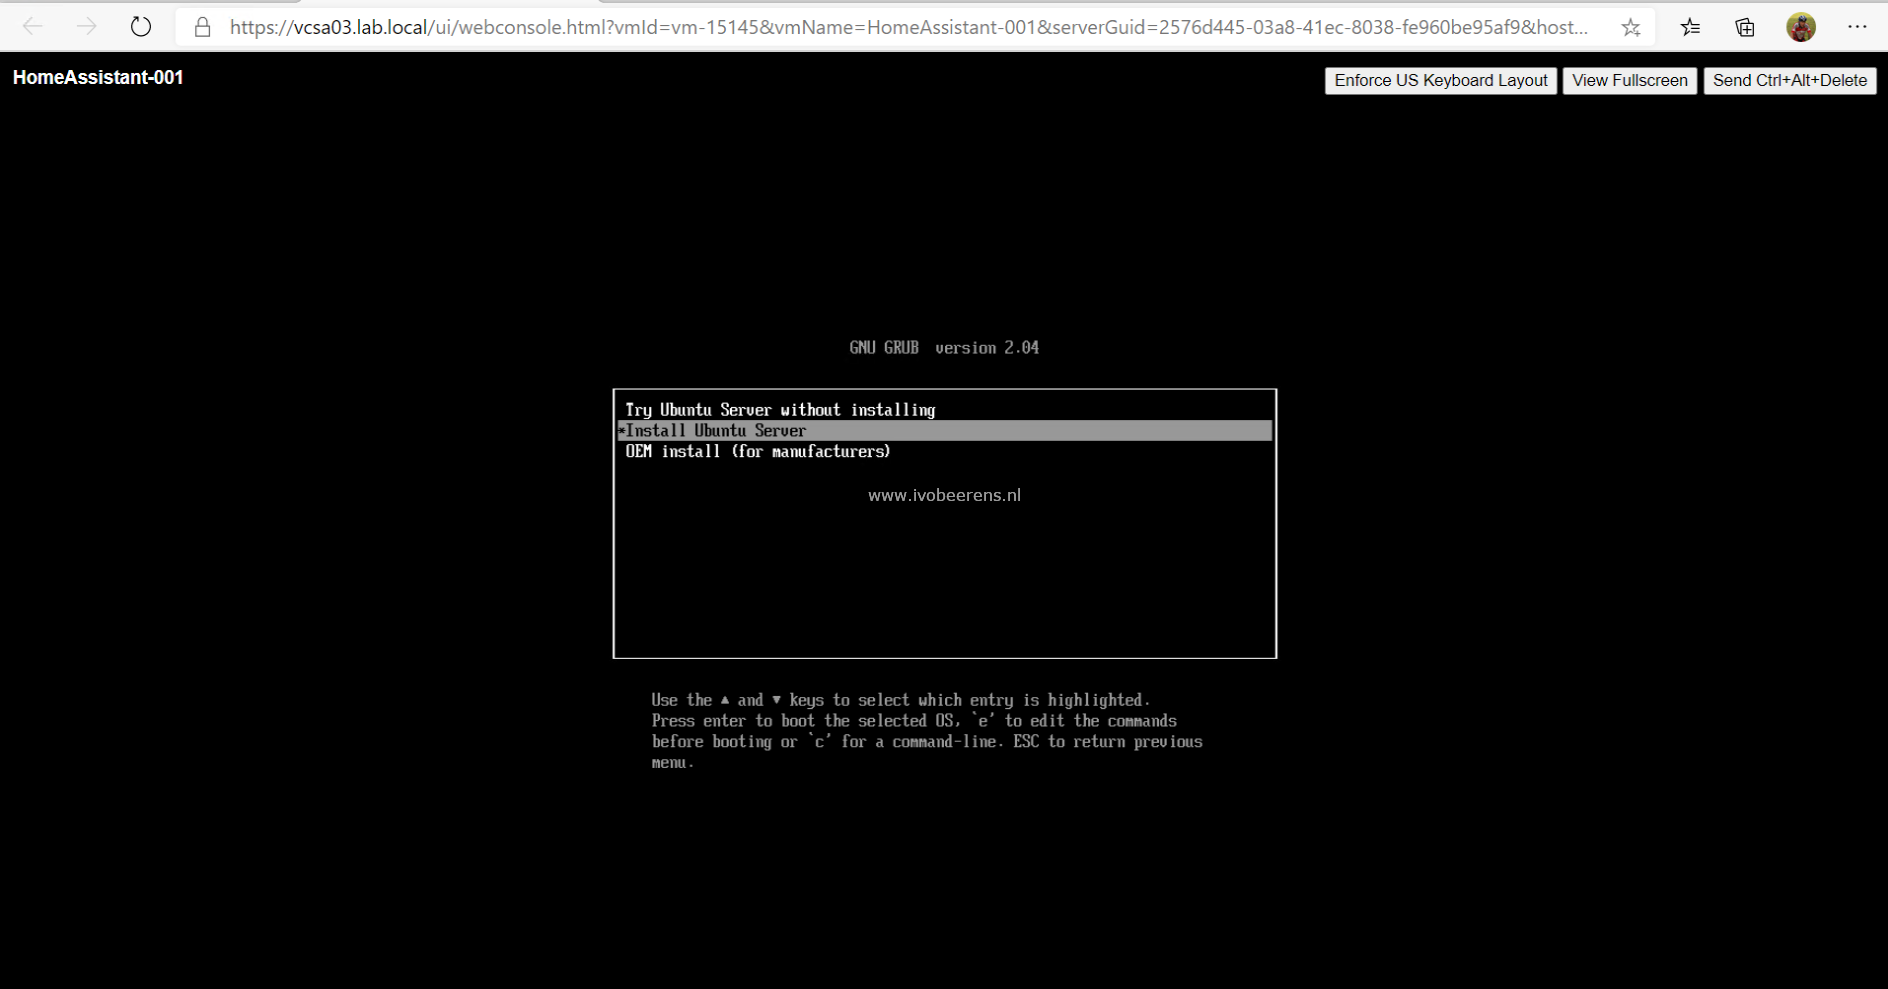
- Language: English
- Select: Install Ubuntu Server
- Choose your preferred language: English
- Keyboard configuration: Select the layout and variant: English US (variant (US)
- Installation: Install Ubuntu
- Networking connections: The
ens160is the ethernet NIC of the VM. Select the IPv4 method: DHCP or a manual fixed IP address - Configure proxy: leave this blank you are a not using a proxy server
- Ubuntu mirror: Use the mirror address suggested
- Filesystem setup: Use an Entire Disk
- Filesystem summary: Done
- Confirm destructive action. Are you sure you want to continue: Continue
- Profile setup: Fill in the following fields (remember the username and password)
- Your name:
- Your server’s name:
- Pick a username:
- Choose a password:
- Confirm a password:
- Your name:
- SSH Setup: Install the OpenSSH server
- Import SSH identity: No
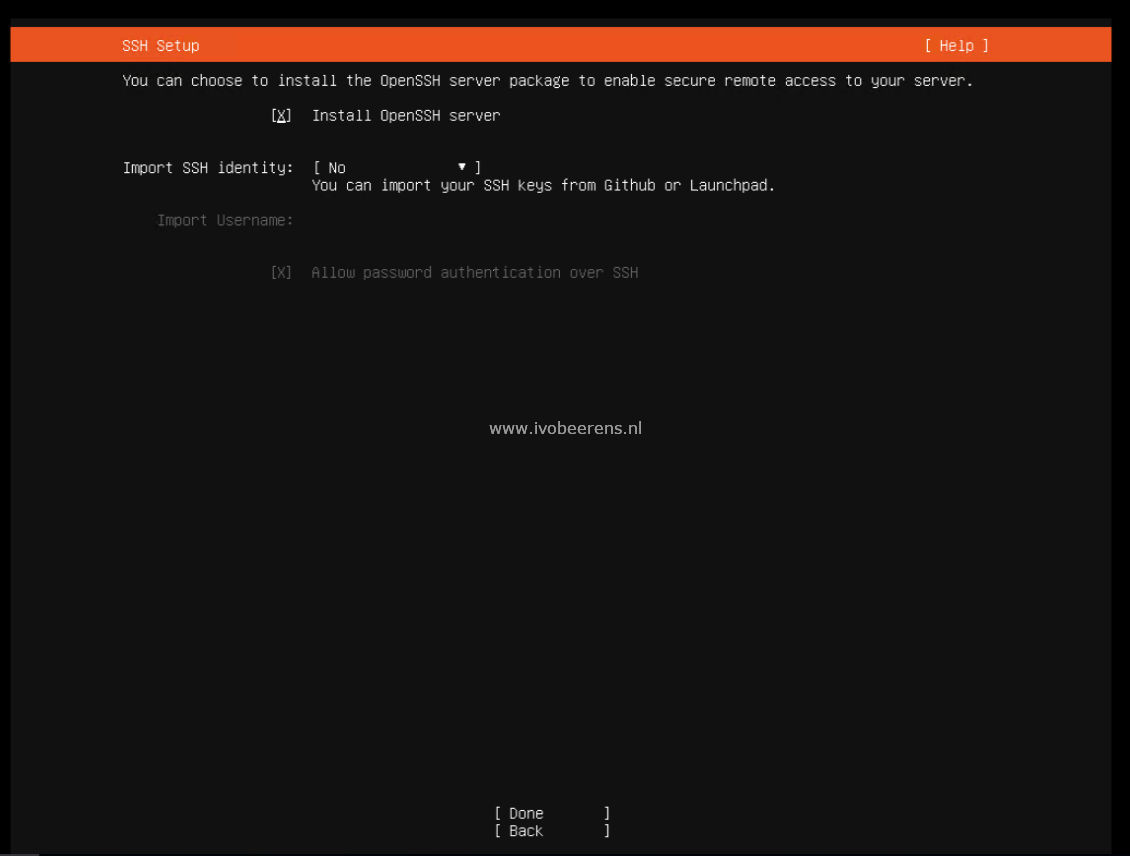
- Featured Server Snaps: Select none
- The installation of Ubuntu begins
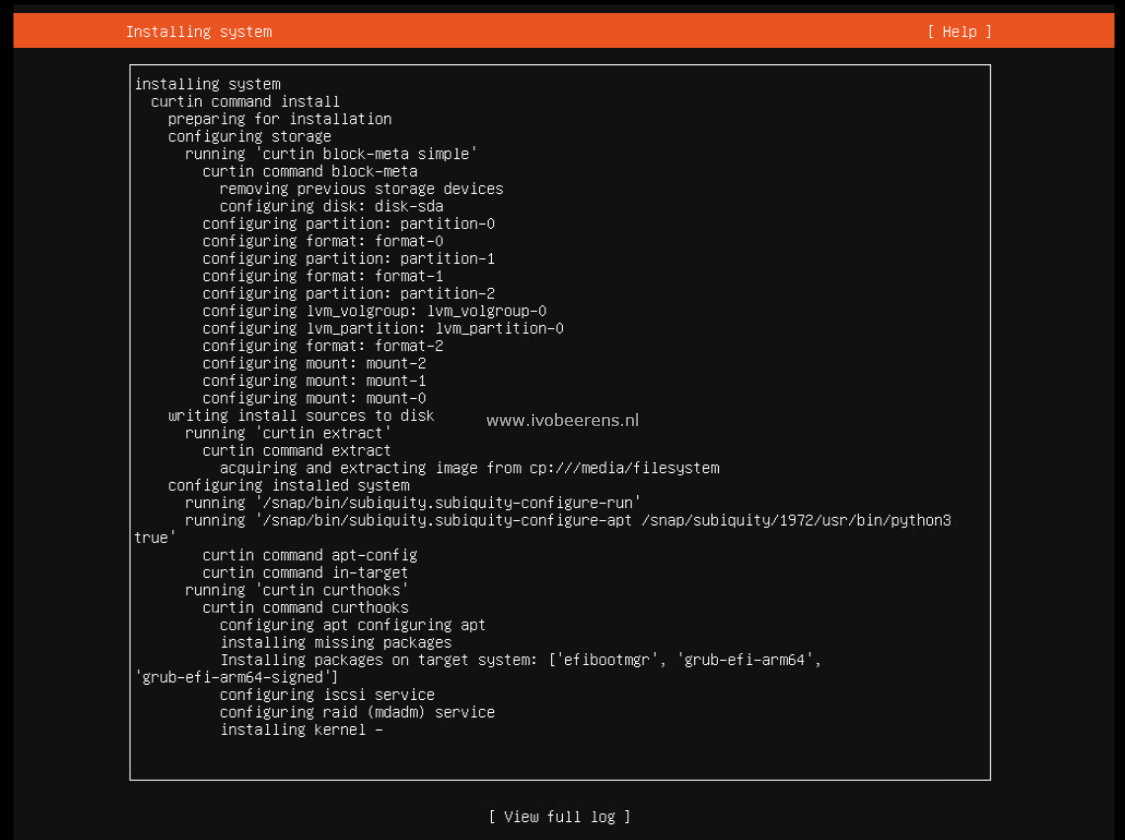
- Once the installation is complete! Reboot the system
After the installation of the Ubuntu OS, perform the following post configuration actions:
- In a console session, find the IP address with the
ip -acommand. VMware Tools is not installed yet, so the IP address is not visible in VM properties. - Connect to the Ubuntu using an SSH session with Putty for example
- Install the latest Ubuntu updates and upgrades
sudo apt update && sudo apt upgrade -y
sudo reboot
Open VMware Tools installation
In the SSH session install package dependencies and clone the open git repository.
sudo -i
apt install -y automake-1.15 pkg-config libtool libmspack-dev libglib2.0-dev libpam0g-dev libssl-dev libxml2-dev libxmlsec1-dev libx11-dev libxext-dev libxinerama-dev libxi-dev libxrender-dev libxrandr-dev libgtk2.0-dev libgtk-3-dev libgtkmm-3.0-dev
git clone https://github.com/VMware/open-vm-tools.git
cd open-vm-tools/open-vm-tools/
autoreconf -i
./configure
make
make install
ldconfig
build and install the Open VMware Tools
autoreconf -i
./configure
make
make install
ldconfig
create a vmtoolsd.service file
cat > /etc/systemd/system/vmtoolsd.service << EOF
[Unit]
Description=
Description=Open VM Tools
After=
After=network-online.target
[Service]
ExecStart=
ExecStart=/usr/local/bin/vmtoolsd
Restart=always
RestartSec=1sec
[Install]
WantedBy=multi-user.target
EOF
Enable the VMware Tools daemon at startup
systemctl enable vmtoolsd.service
systemctl start vmtoolsd.service
Check if the VMware tools are running
systemctl status vmtoolsd.service

Docker installation
In the SSH session run the following commands:
apt install software-properties-common -y
apt-get install -y apparmor-utils apt-transport-https avahi-daemon ca-certificates curl dbus jq network-manager socat
curl -fsSL get.docker.com | sh
Home Assistant installation
In the SSH session run the following command:
curl -sL "https://raw.githubusercontent.com/home-assistant/supervised-installer/master/installer.sh" | bash -s -- -m raspberrypi4
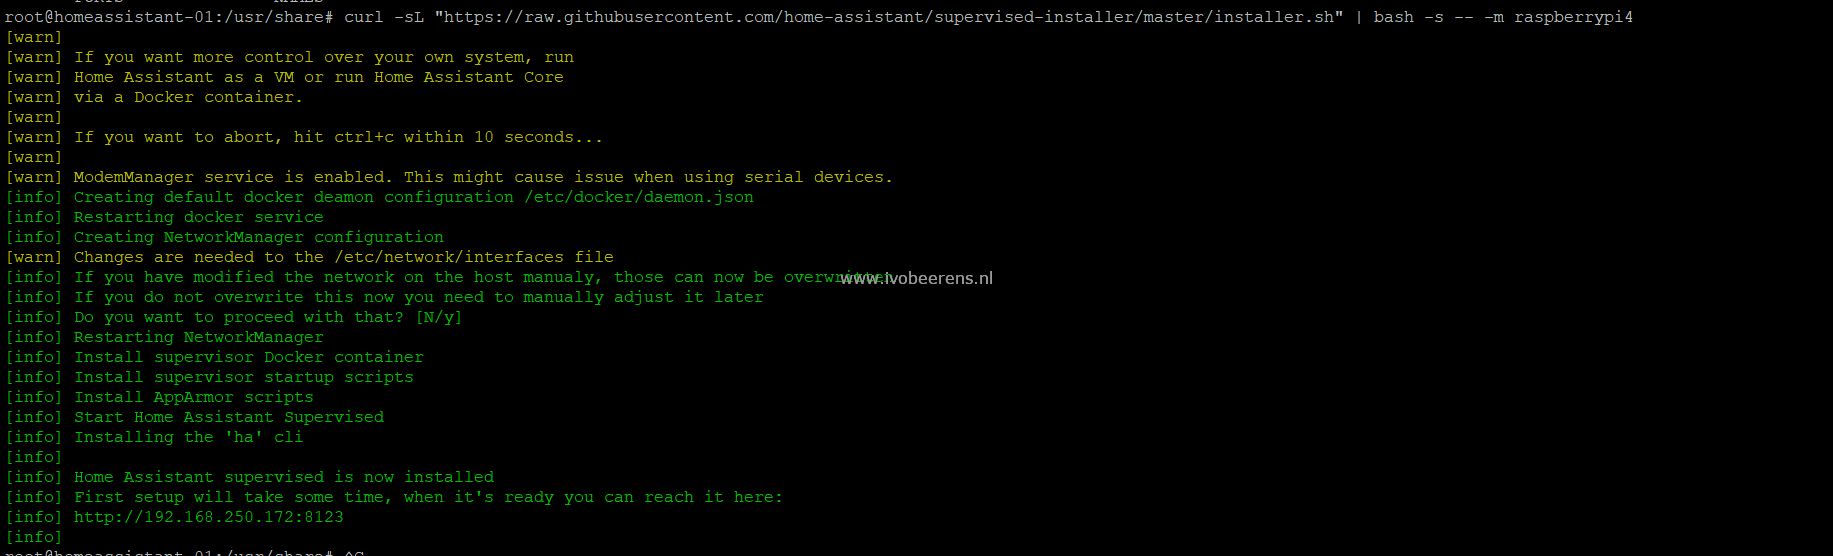 |  |
After the installation, it takes about 1 minute for all the 7 docker HA containers are up. You can check this by using the docker -ps command.
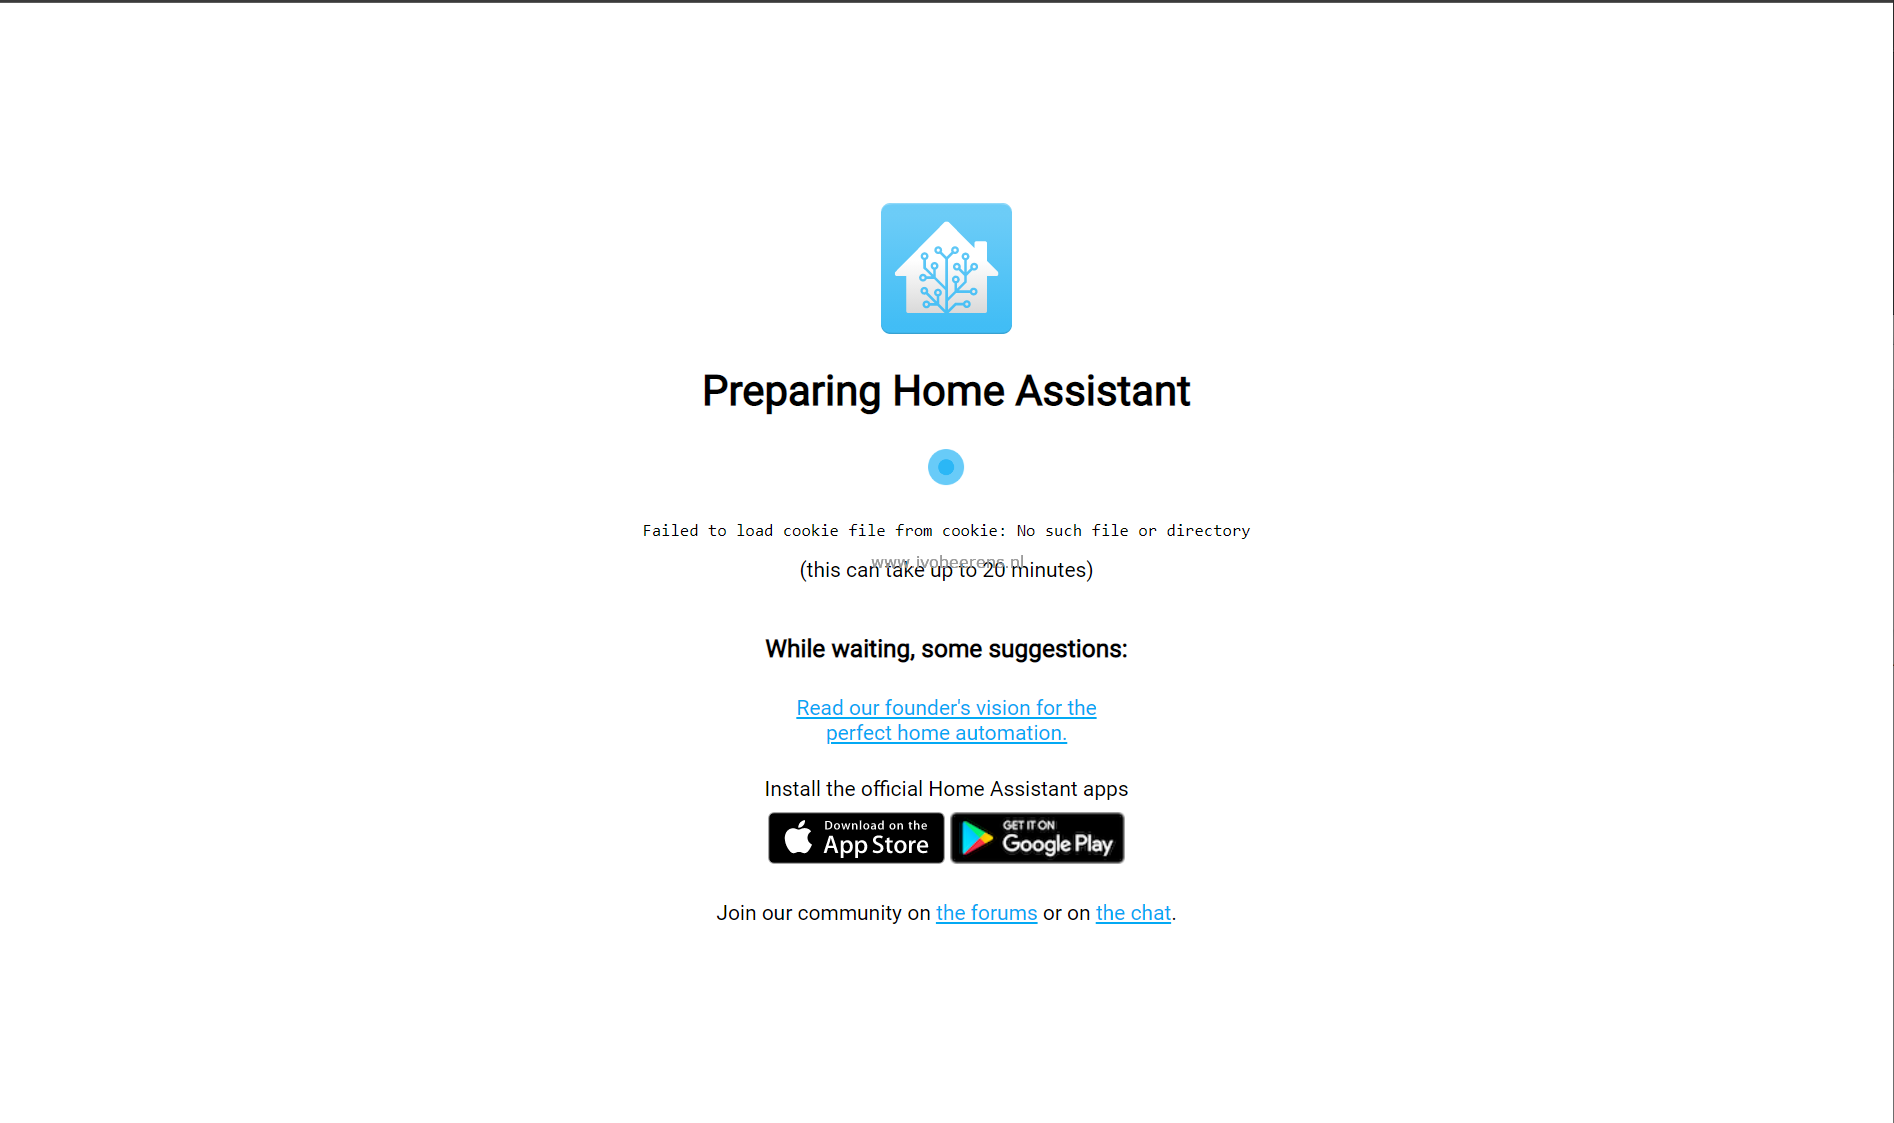 |  |
When the docker containers are up, you can make a web browser connection to:
http://<ip address:8123>
There will be a “Preparing Home Assistant” page for some minutes. Once completed you’re ready to create a user of restore a snapshot of you’re existing configuration. After this, you can start with your home automation projects.