Run Home Assistant on VMware ESXi
Updated: August 19, 2023. Debian 11 is not supported any more for running Home Assistant Supervised. For a supported configuration, you need Debian 12. The steps in this blog are updated to install Home Assistant as Debian 12 VM in VMware ESXi.
Updated: December 2, 2022. Debian 10 is not supported any more for running Home Assistant Supervised. For a supported configuration, you need Debian 11 (Bullseye). The steps in this blog are updated to install Home Assistant as Debian 11 VM in VMware ESXi.
Home Assistant Supervised provides the full Home Assistant experience on a regular operating system. The Supervisor is not just an application but it is a full appliance that manages the whole system. Home Assistant supervised is only supported on a Debian 12 Operating System. Below are the steps described on how to install Home Assistant Supervised as Virtual Machine on a Debian 11 (Bullseye) Operating System in VMware ESXi.
Configure the Virtual Machine hardware specifications
- Download the debian-live-12.1.0-amd64-standard.iso, Link
- Make a connection to the ESXi host:
https://<ip-address>/ui - Upload the Debian ISO to a datastore
- Create a new virtual machine with the following specifications:
- Name:
- Compatibility: Default (ESXi 8 and later)
- Guest OS family: Linux
- Guest OS version: Debian GNU/Linux 12 (64-bit)
- Storage: datastore with more than 30 GB of free space
- CPUs: 2
- Memory: 2048 MB
- Hard disk 1: 40 GB
- Disk Provisioning: Thin provisioned
- SCSI Controller 0: VMware Paravirtual
- USB controller 1: USB 2.0 or 3.0 depending on the ESXi hardware
- Network adapter 1: Select the port group
- Adapter type: E1000e
- CD/DVD Drive 1: Datastore ISO file
- Browse to the Debian ISO
- Connect at Power: checked
- Video Card: Default settings
- Next
- Finish
- Power on the VM
- Open a console session
- Name:
The VM is now configured with a paravirtualized SCSI controller (PVSCSI) and VMXNET3 Virtual NIC.
Install Debian 12 as VM on VMware ESXi
- Installer Menu: Start Installer
- Language: English
- Location: Other, Europe, Netherlands
- Locales: United States
- Keymap: American English
- Enter the hostname: ha-deb12-01
- Domain name:
- Root password:
- Full Name for the user:
- User name:
- Choose Password for the new user:
- Partition Disks: Guided - Use the entire disk and set up LVM
- Select disk to partition: SCSI1 (0,0,0) - 32,2 GB VMware Virtual Disk
- Partition scheme: All files in one partition (recommended for new users)
- Write the changes to disk and configure LVM: Yes
- Amount of volume group to use for guided partitioning: 42.4 GB
- Select: Continue
- Write changes to disks: Yes
- Configure the Package manager: Yes
- Debian archive mirror country: Select the archive mirror country nearby. I selected Netherlands
- Debian archive mirror: deb.debian.org
- HTTP Proxy: Leave empty and select continue
- Participate in the package usage survey: No
- Software selection:
- Check: SSH server and standard system utilities
- Uncheck: Debian desktop environment
- Uncheck: GNOME
- Install the GRUB boot loader to the master boot record. Yes
- Device for boot loader installation? /dev/sda
- Installation is complete.
- Finish the installation: Continue
The Debian VM will be rebooted and is ready for use. After the installation, open a console session and log in.
Enable SSH
sudo apt install openssh-server
sudo nano /etc/ssh/sshd_config
Enable port 22 and save the file
systemctl restart ssh
Enable Sudo on the user account
nano /etc/sudoers
Save
Under the “User privilege specification” add the user account created during the Debian installation. Replace the
username ALL=(ALL:ALL) ALL
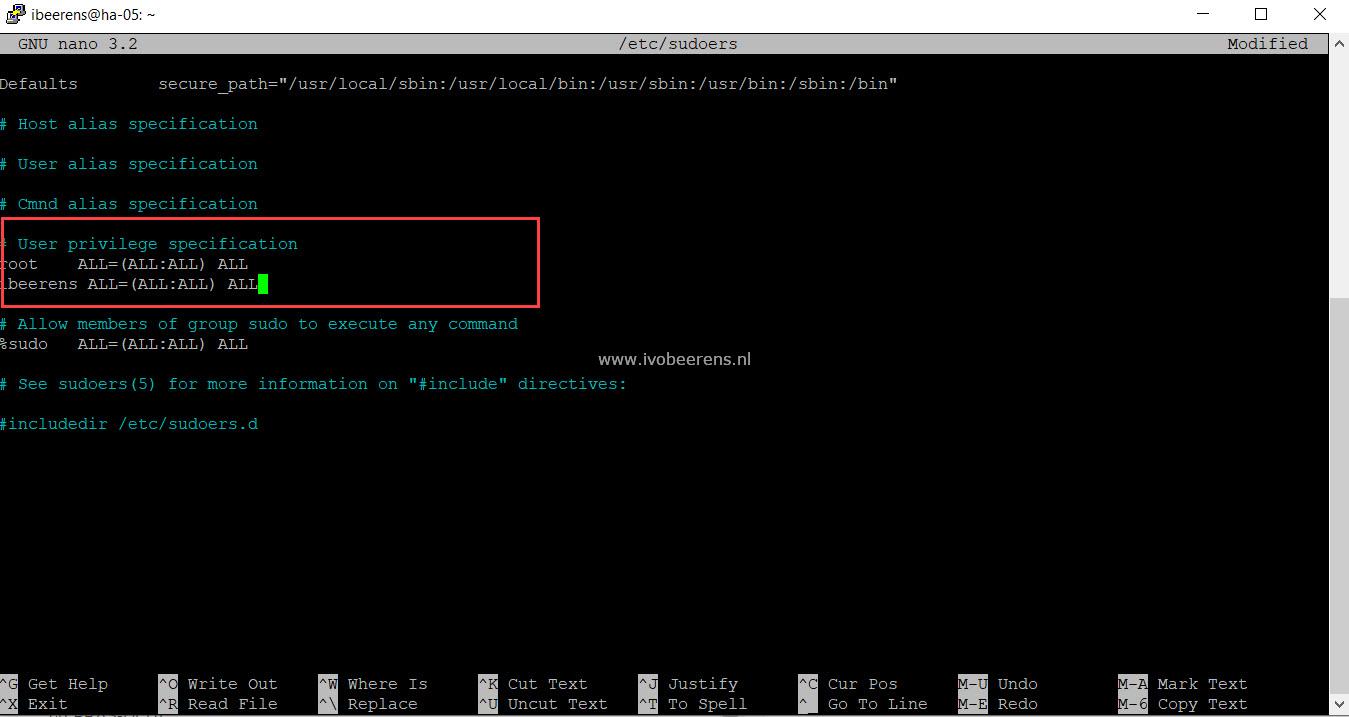
Press CTRL + X to save the file. Now it is possible to use the sudo account under your username.
exit
sudo -i
More information: How to Install and Enable SSH on Debian 12/11/10 - LinuxCapable
Update all Debian packages
apt update && sudo apt upgrade -y && sudo apt autoremove -y
Find the IPv4 address of the VM by using the command:
VMware Tools is included in the Debian distribution so you don’t need to install VMware Tools package. Find the IP address by using the following command:
ifconfig ens192
Look for the inet address. That’s the IP address.
Make an SSH connection to the VM
Connect using SSH to the IP address of the Debian VM by using Putty for example.
sudo -i
Install the required packages
apt-get install \
apparmor \
jq \
wget \
curl \
udisks2 \
libglib2.0-bin \
network-manager \
dbus \
lsb-release \
systemd-journal-remote -y
Install Docker-CE
curl -fsSL get.docker.com | sh
Install the latest Agent
The latest agents can be found here: https://github.com/home-assistant/os-agent/releases/latest
Replace the “os-agent_1.5.1_linux_x86_64.deb” with the agent version you downloaded.
wget https://github.com/home-assistant/os-agent/releases/download/1.5.1/os-agent_1.5.1_linux_x86_64.deb
dpkg -i os-agent_1.5.1_linux_x86_64.deb
You can check if the installation was successful by running the following command.
gdbus introspect --system --dest io.hass.os --object-path /io/hass/os
This should not return an error.
Install Home Assistant Supervised Debian Package
wget https://github.com/home-assistant/supervised-installer/releases/latest/download/homeassistant-supervised.deb
dpkg -i homeassistant-supervised.deb
A reboot of the Debian VM is necessary.
reboot
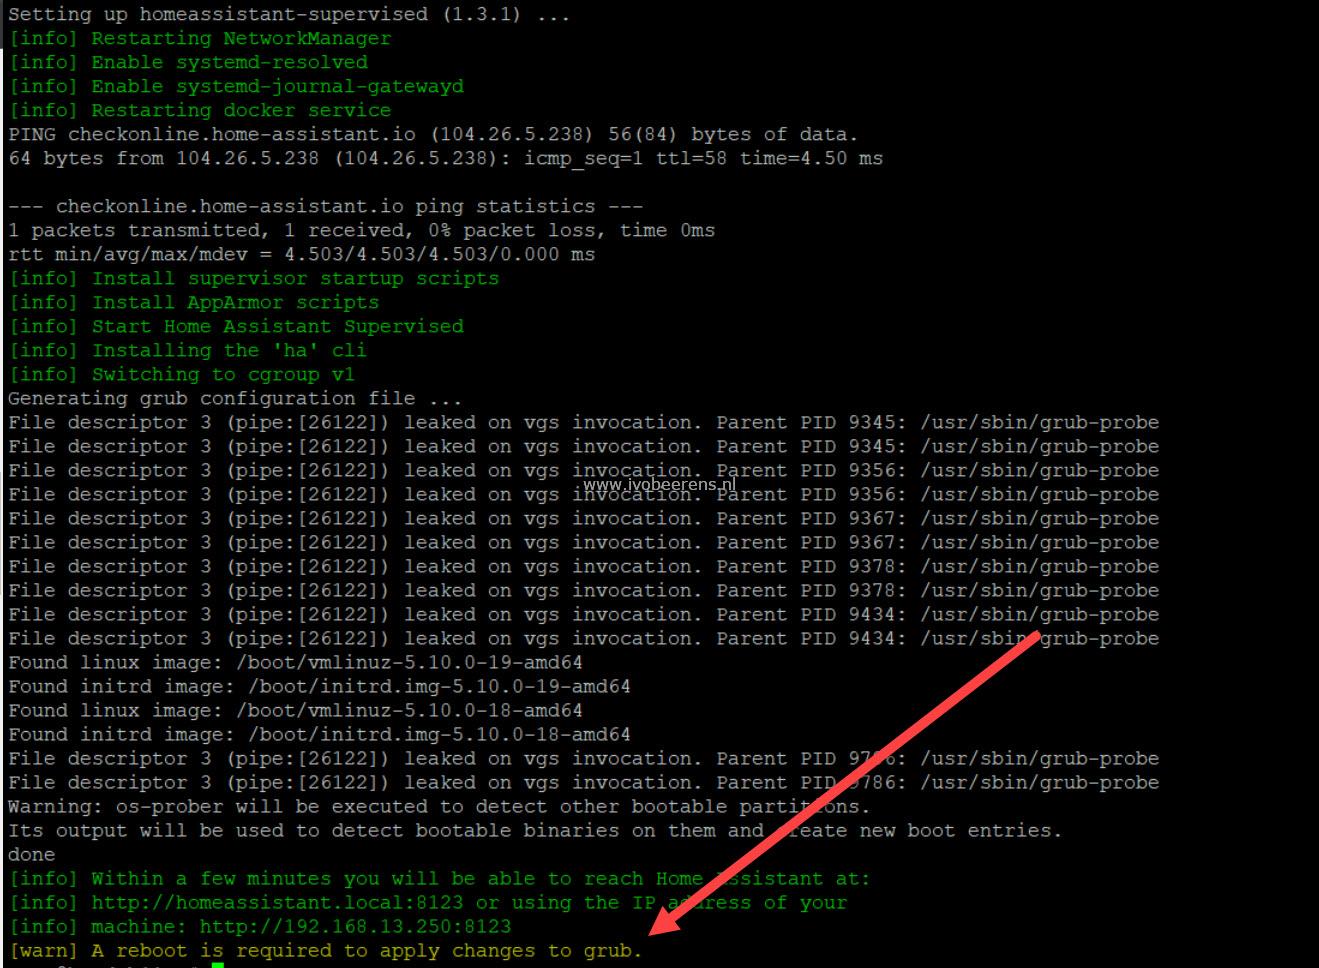
After the reboot, you need to wait (between 1 and 20 minutes) for the initial Home Assistant configuration. With the command docker ps you can view the status of the Docker containers. The status must be Up xx minutes.
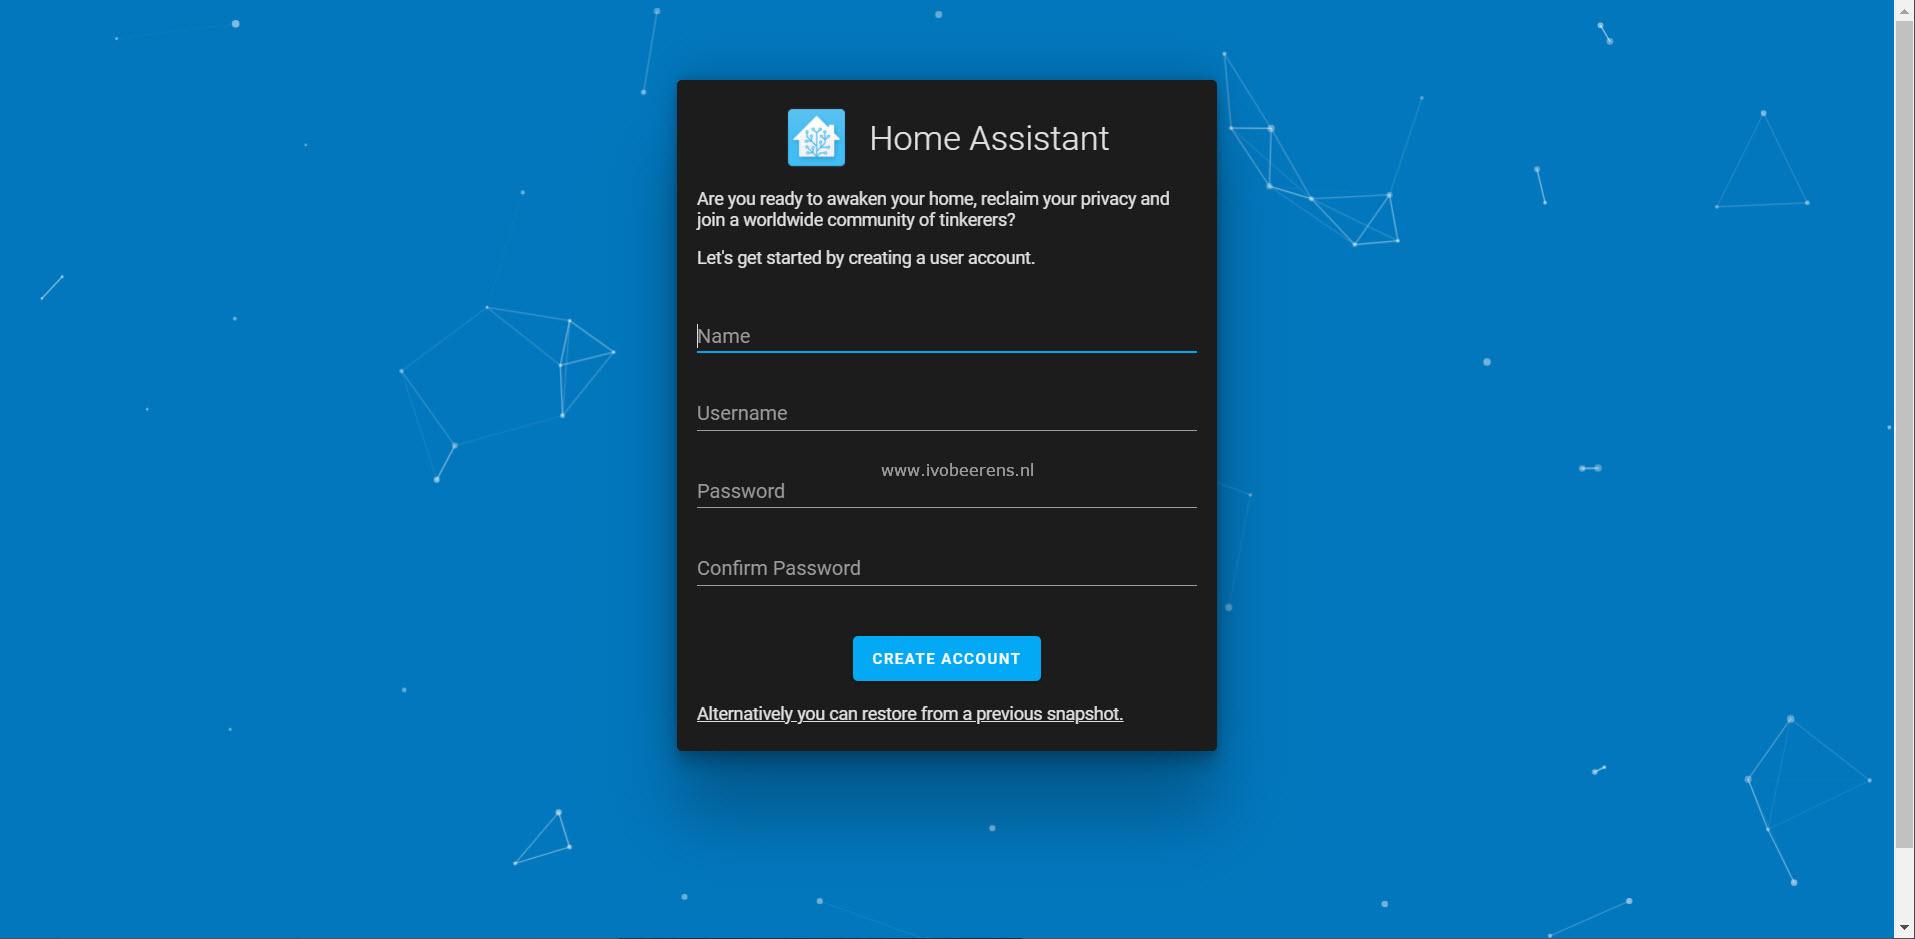
Connect to Hass.io: http://<hostname or IP>:8123
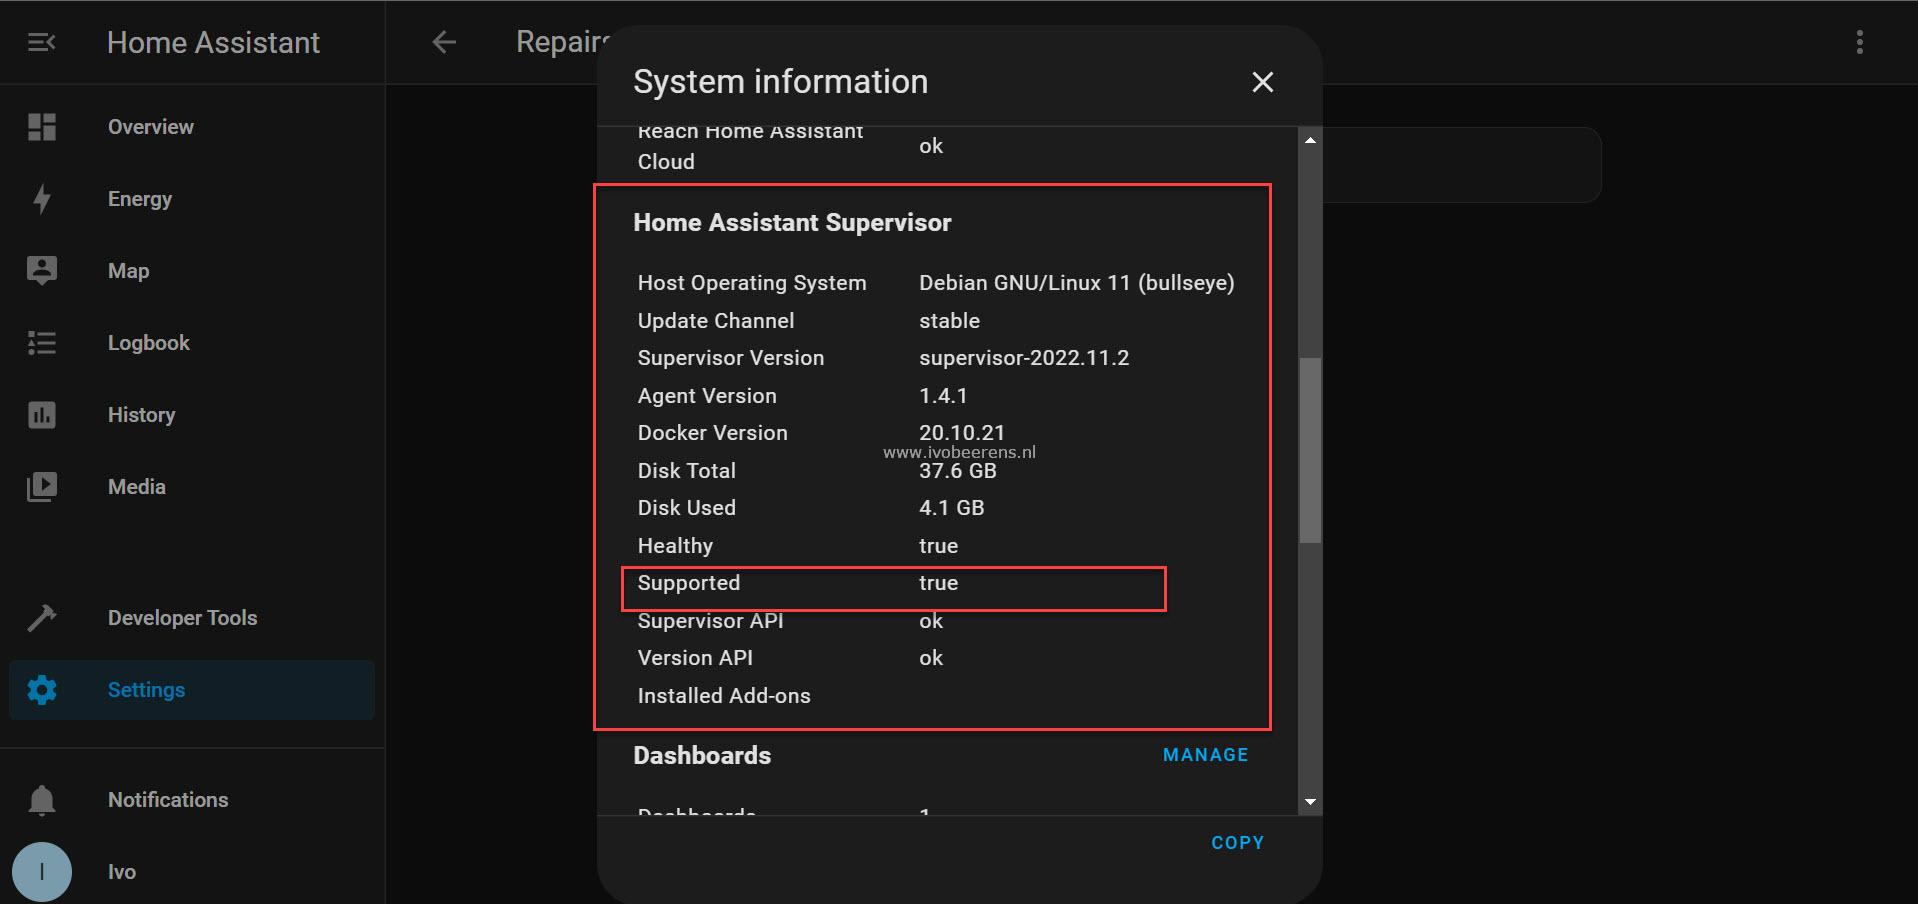
Home Assistant Supervised is now installed and running as a Virtual Machine on VMware ESXi. You can check the system health by browsing to:
Settings -> System -> Repairs -> 3 dots -> System Information
More information:
GitHub - home-assistant/supervised-installer: Installer for a generic Linux system