Install Windows 11 on VMware vSphere with a virtual TPM
Yesterday I wrote a blog called “Install Windows 11 as VM on VMware vSphere / Workstation without TPM 2.0 chipset“. In this blog article, I explained how to install Windows 11 without having a TPM 2.0 chipset by using a registry hack. Paul Braren from tinkertry.com created a cool video (link) about installing Windows 11 on VMware vSphere using my blog article. Bob Plankers (@plankers) replied on Twitter that virtual TPM can be used too.
You can just add a virtual TPM in Workstation or vSphere, too. — (@plankers) October 6, 2021
So I did some research in my home lab. With VMware vSphere and VMware Workstation, it is possible to install Windows 11 by using a vTPM device that emulates a physical TPM 2.0 chipset without having one. This is called Virtual Trusted Platform Module (vTPM). A vTPM performs the same functions as a hardware TPM, it performs cryptographic coprocessor capabilities in software So without having a physical TPM 2.0 you can run Windows 11 without performing any hacks to the Windows 11 Operating System.
In this blog post, I explain how to configure vTPM for VMware vSphere and install Windows 11. Here are the steps:
Requirements for vTPM
- EFI firmware
- Hardware Version 14 or later
- vSphere 6.7 or later
- Virtual Machine encryption
- Key Provider. The Key Provider is used to enable encrypted technologies such as TPM
To enable vTPM you must first add a Key Provider
- Open the vSphere Client URL (https://vcentername/ui)
- Log-in
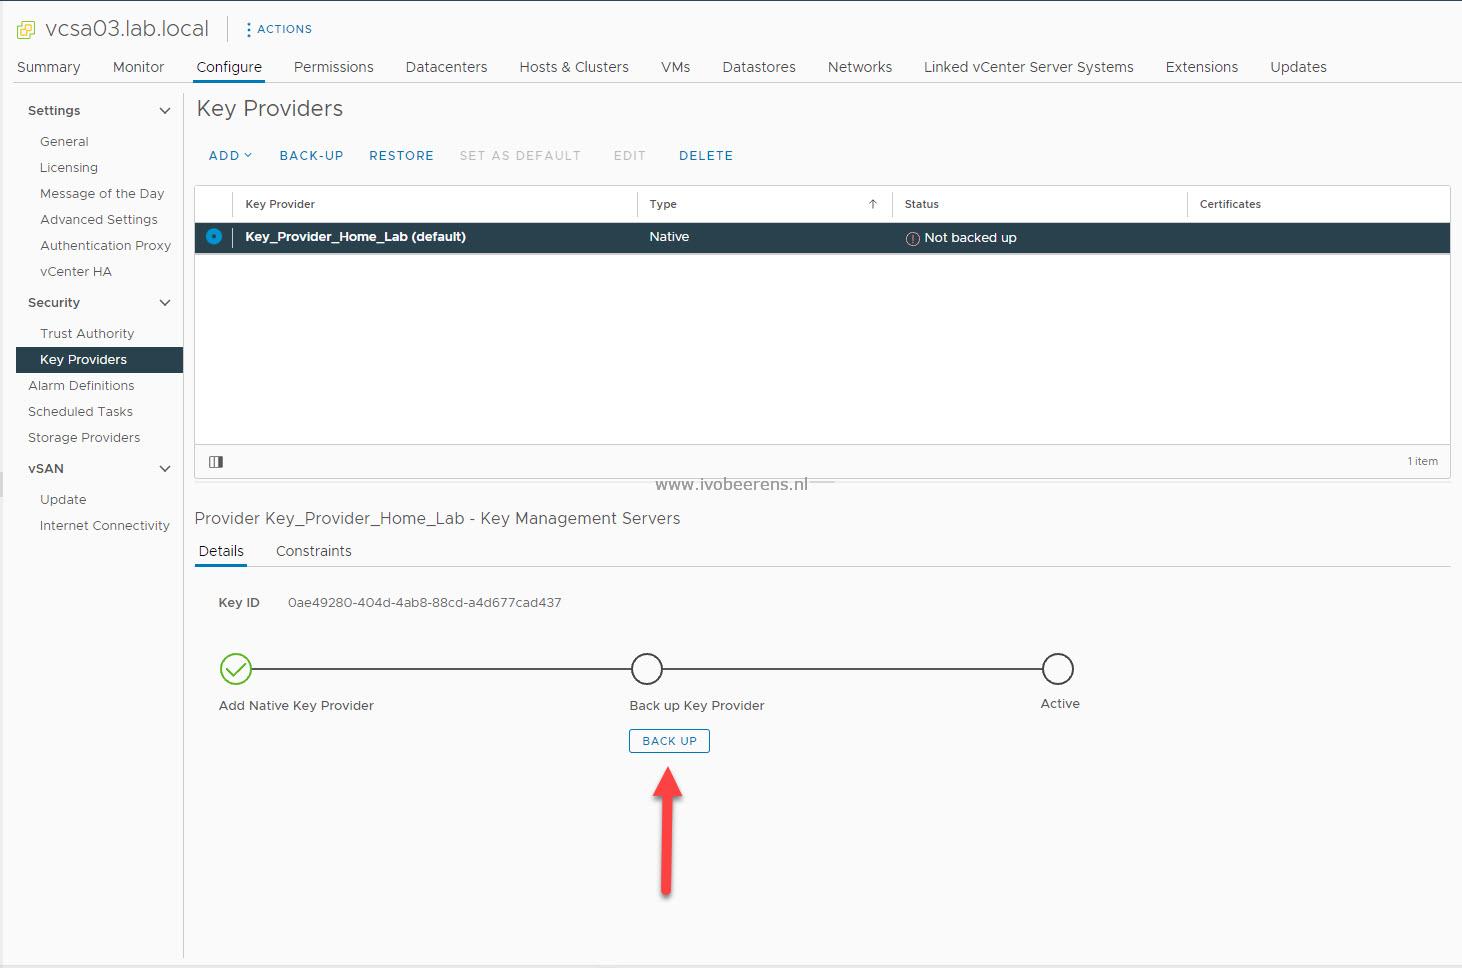
- Click on the vCenter name - Configure and select Key Providers
- Click on ADD
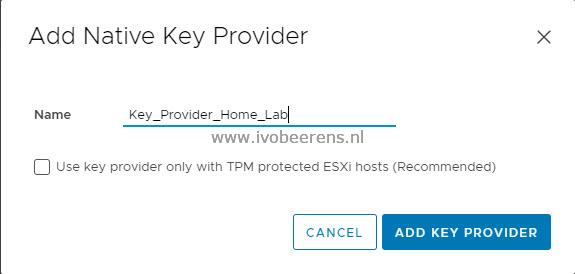
- Select Add Native Key Provider. When using the Native Key provider you don’t need an external key server**.**
- Enter a name for the Key Provider and uncheck “Use key provider only with TPM protected ESXi hosts (Recommended).
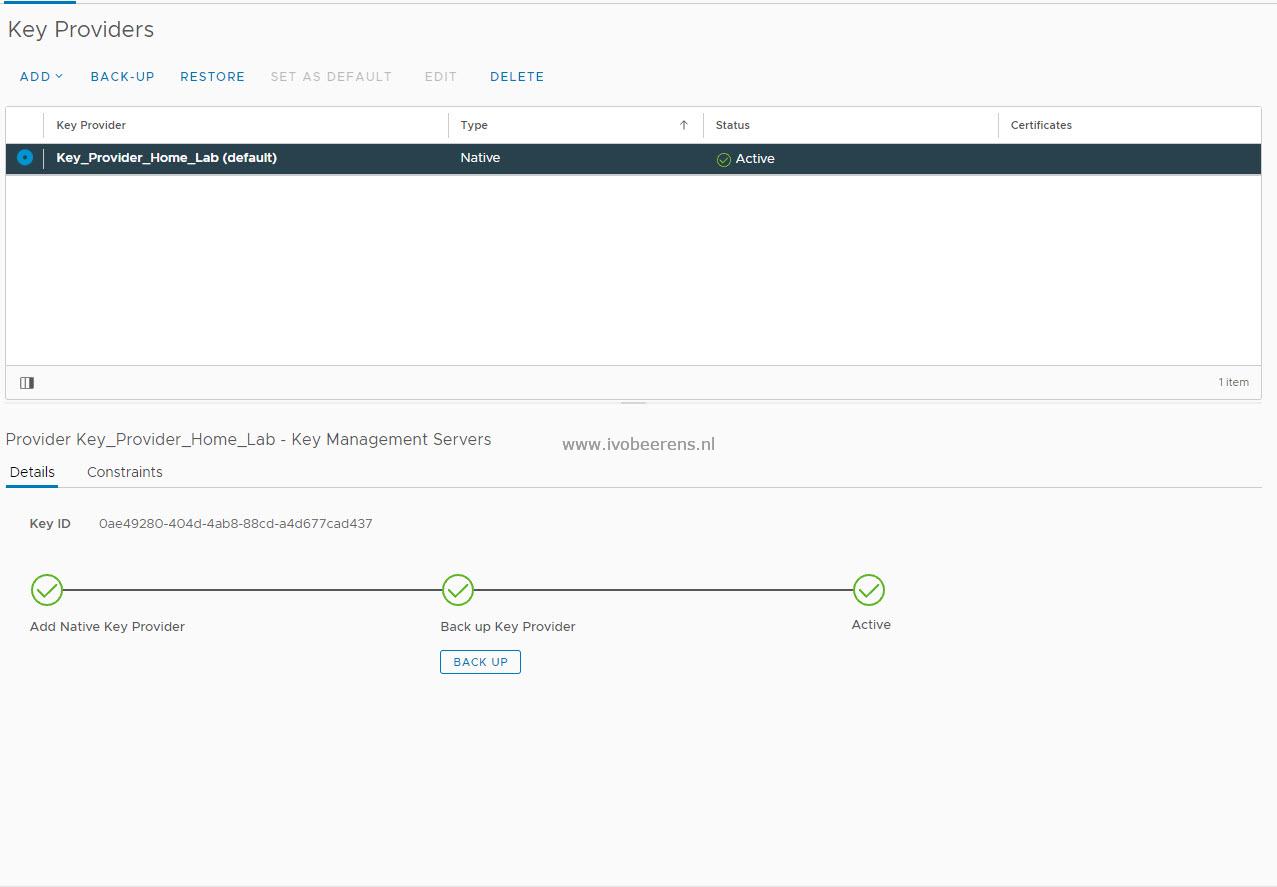
- Select Backup and uncheck “Protect Native Key Provider data with password (Recommended)” and click on BACK UP KEY PROVIDER
- The Key Provider is configured and active now
Windows 11 VM Configuration
For the Windows 11 VM configuration, I configured the following:
- Create or download a Windows 11 ISO (for more information see the blog post mentioned at the beginning).
- Copy the ISO to a datastore that can be accessed when used to install Windows 11
In the vCenter client create a new VM with the following specification:
- Configuration step 1: Create a new Virtual Machine
- Configuration step 2: Enter the Virtual Machine name
- Configuration step 3: Select the ESXi host or cluster for the VM
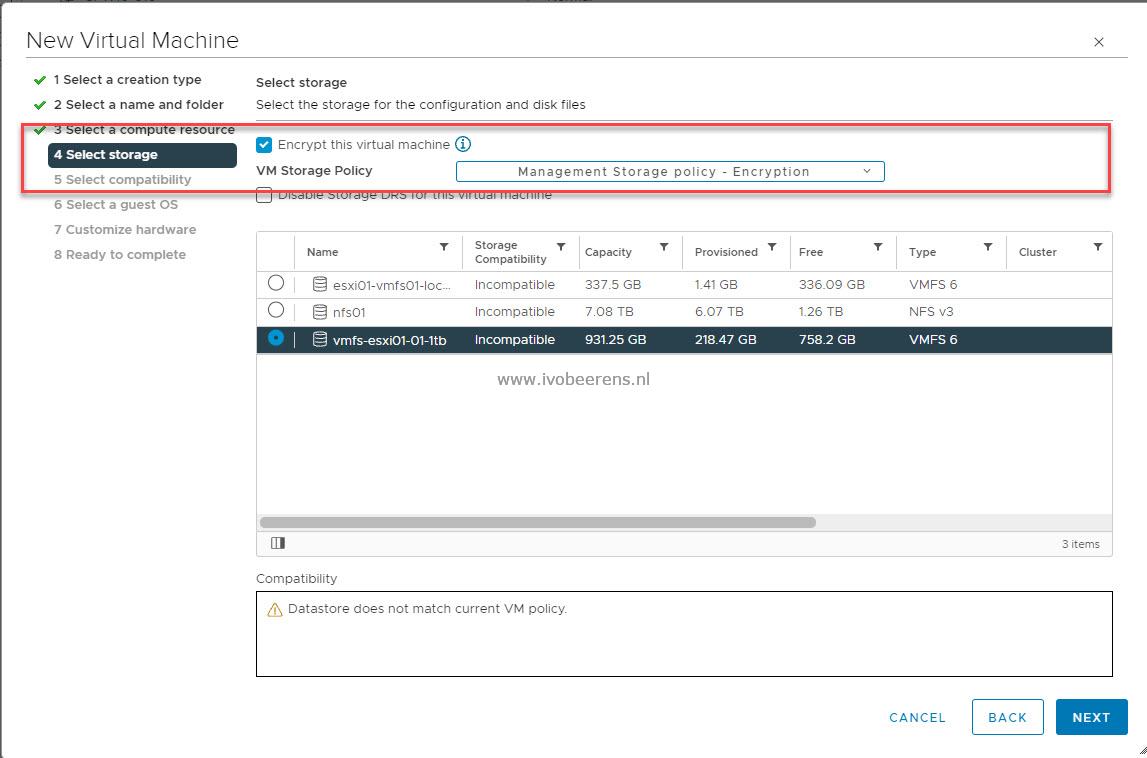
- Configuration step 4: Select the datastore and select Encrypt this virtual machine
- Configuration step 5: Compatibility: ESXi 7.0 U2 and later (I’m using ESXi 7)
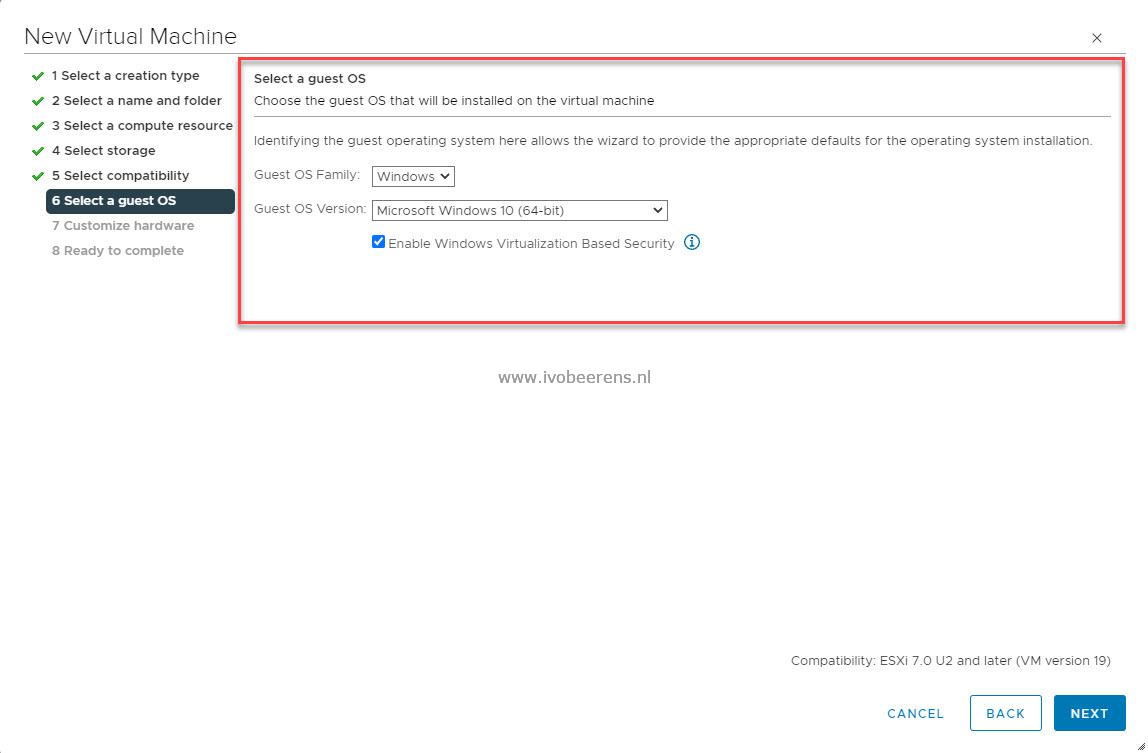
- Configuration step 6: Guest OS: Guest OS Family: Windows
- Guest OS Version: Windows 10 (64-bit)
- Enable Windows Virtualization Based Security: Check
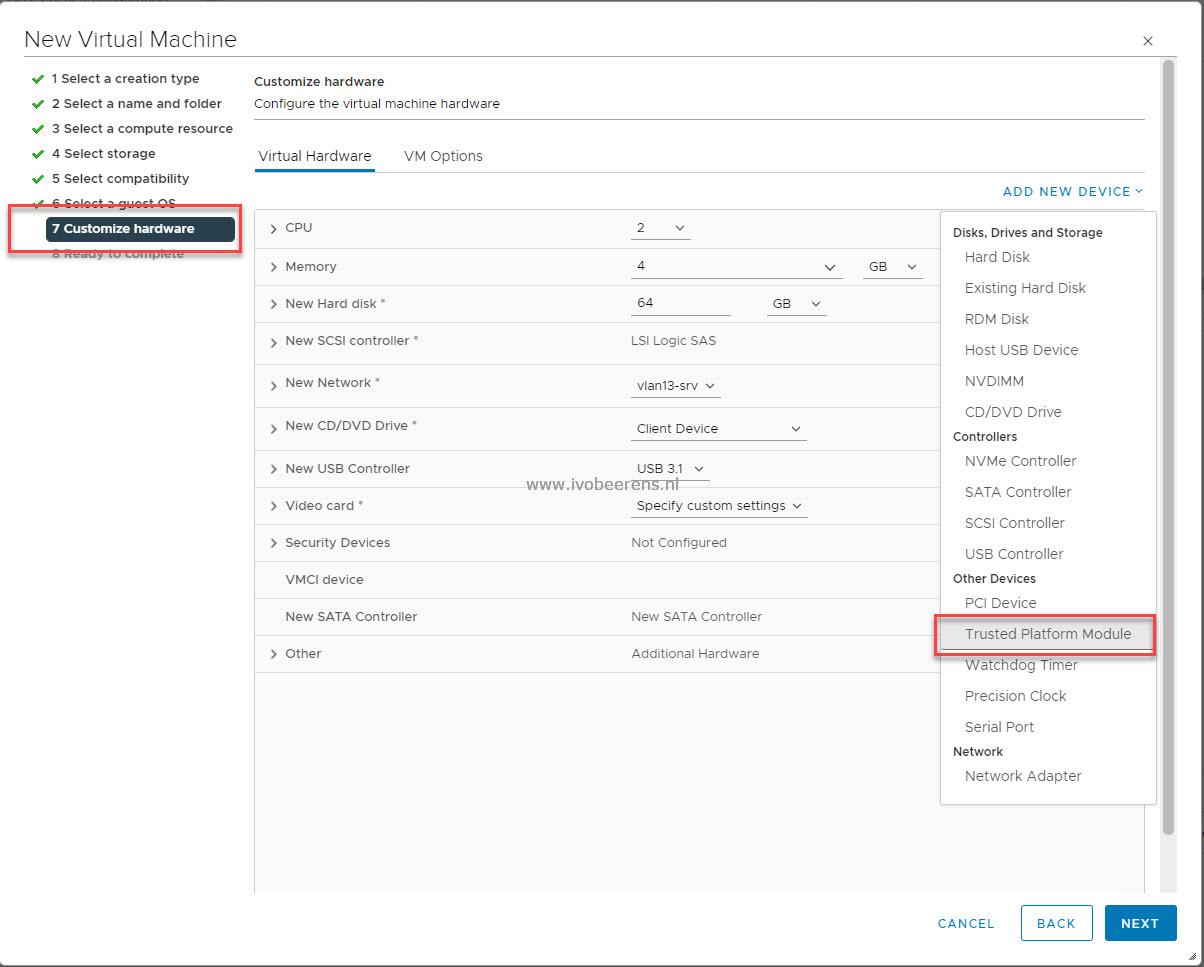
- Configuration step 7: CPU:
- 2 or more
- Memory: 4 GB or more
- Hard disk: 64 GB or more
- CD/DVD: Mount the ISO on the datastore
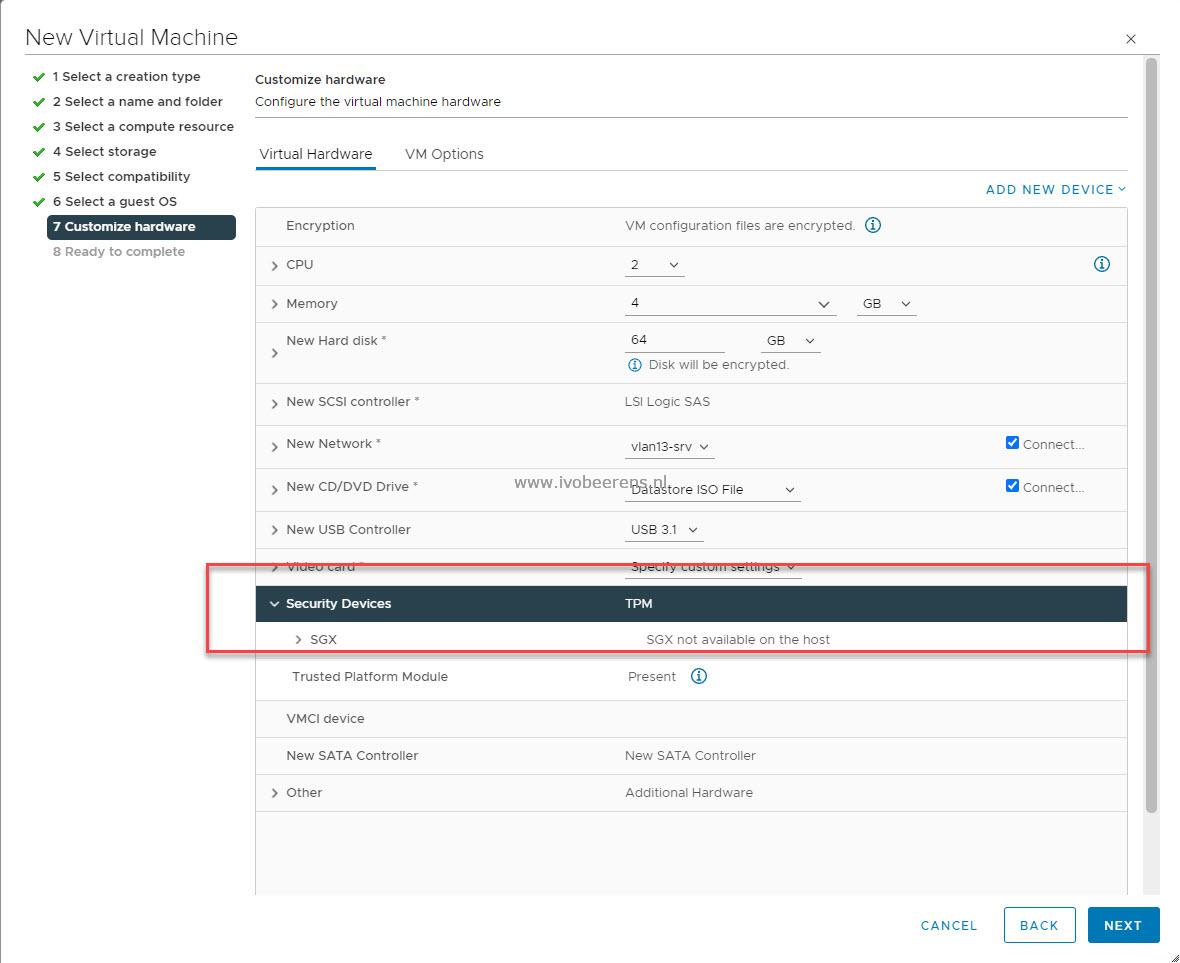
- Custom Hardware Select Add New Device and choose for Trusted Platform Module
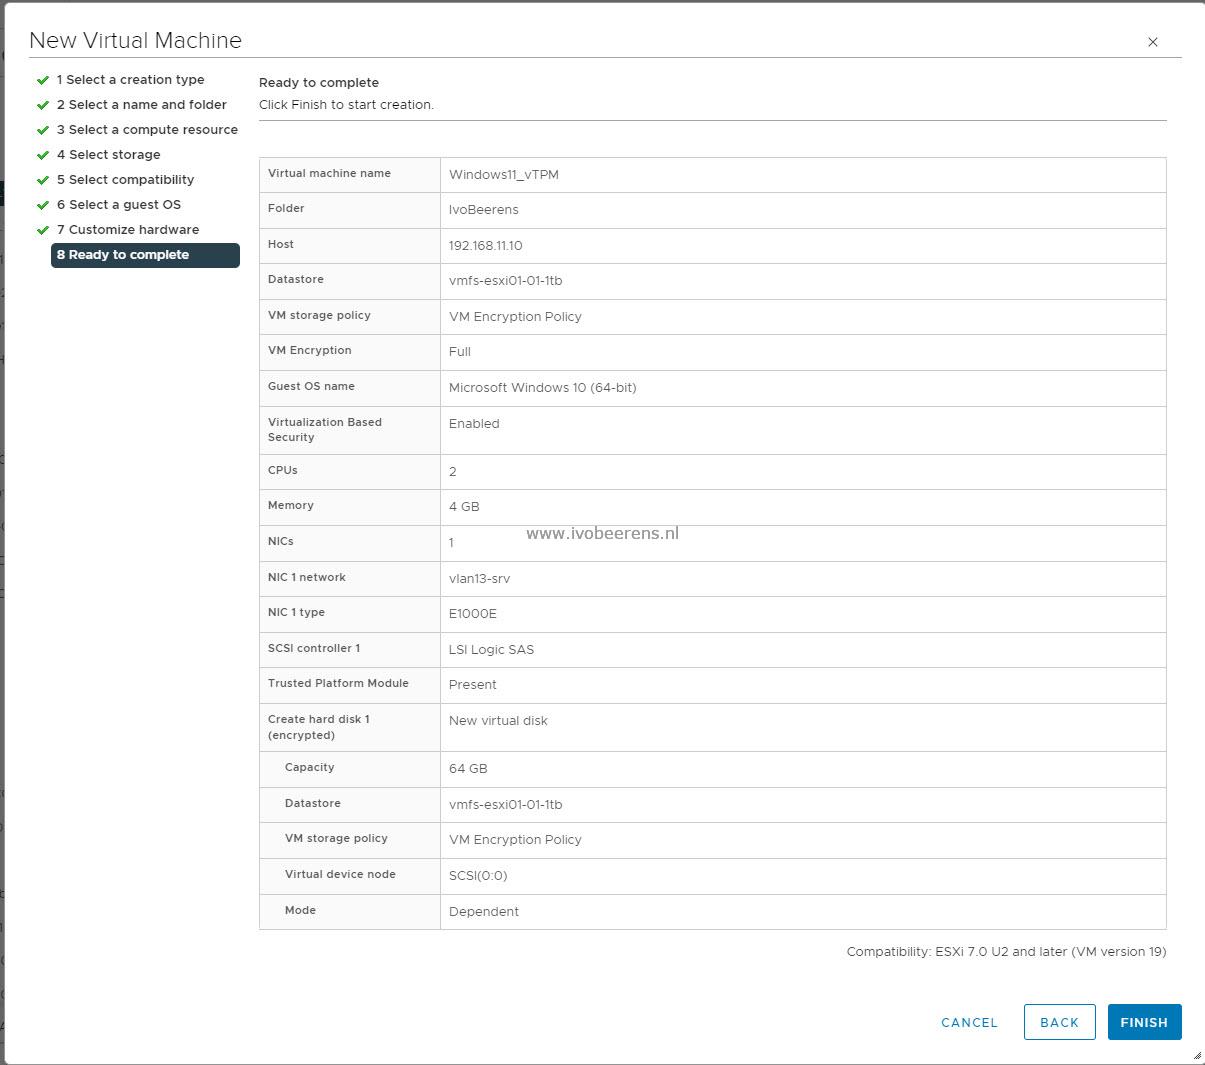
Configuration step 8: VM configuration overview - Click on Finish
- Start the VM and the installation begins without complaining that this PC can’t run Windows 11
Windows 11 can be installed without having a physical TPM 2.0 chipset or using the registry hack mentioned at the beginning of the blog post. How cool is that!